
If you've never tried it, Scrivener is a popular writer's software that I now couldn't write without. However, I often end up giving other writers quick orientation demos, because when you first open the Scrivener app it can seem overwhelming.Here are 5 steps to help you get going once you've downloaded the free Scrivener trial.Disclaimer: I'm just a fellow writer. I'm not remunerated by or affiliated with Scrivener.
Step 1 Get yersel' a template
Let’s assume you’ve downloaded the software and used this icon to launch the Scrivener app.
You're going to be faced with a screen that looks like this:

There's an Interactive Tutorial option you can choose from this screen, but honestly it's very text centric and you'd be better using some of the free starter tutorials on these sites.
Literature & Latte (the makers of Scrivener)
Simply Scrivener by Rebeca Schiller
Scrivener classes by Gwen Hernandez who wrote Scrivener for Dummies
So what to choose on this screen? This is where I'd recommend to go get yersel' a template (my Scottish side coming out).
If you have a writing approach you love (such as the snowflake method, beat structure etc) start by looking for your favorite on the amazing list created by Justin Swapp.
Story Genius Template on Writer Unboxed (my favorite!)
For this article, I'll continue with the novel template that comes with the Scrivener app.
To get there on the left side select Fiction >> Novel Template >> Choose. You'll also be prompted for where you want to save the file you're about to work on.

Step 2 Where the hell am I?
You are now looking at a screen something like this:

This is where it often goes wobbly for people.
What am I looking at? What strange (not the Word program I'm familar with) universe have I entered?
Hang with me for five more minutes and this will seem less scary!
Here's the first thing to understand with Scrivener. As you're writing your manuscript, it does not matter how you format things. I repeat (because this is big). In the Scrivener, it does not matter how you format your work. In fact, don't bother with much formatting.
Why? Because in the Scrivener app has a nifty (and very complex) feature called compile that you'll use when you want to export from the software to another application, like Word or direct to Kindle. And it will blow away all your carefully constructed formatting.
So format your work-in-progress for however you prefer to see text while you work. Personally, I like Calibri in double spaced 12 font.
How to understand the Scrivener interface?
First, the organization. The basic construct is the left of your screen is a binder where you organize your work. Just like an old school plastic ring binder.

Let’s peek at the left side of the Scrivener screen. The manuscript folder (top left) is where your work belongs (new writing).
See that folder named research? The research folder is where you can organize everything.
Thats what’s so cool about the Scrivener app. You can add full web pages, photographs, images of characters and locations, research notes and more.
Click around to get the hang of the different folders on the left of the screen (don’t worry about the center or right yet).
Step 3 Add a new text file (or import your existing text)
Let's take a deeper look at the manuscript folder. You'll see a starter chapter and one scene that have already been placed there for you.
Wanna add another scene or chapter?
Adding new text to Scrivener

The key is to realize when you add a new file it will be placed in the folder or section/chapter you selected.
If you'd like to import a whole folder of existing files (for example from Word) that's no problem. Right click where you want them to land, select Add <<< Existing Files<< and select the folder or files from your hard drive that you wish to bring into Scrivener.
Step 4 The corkboard is your friend
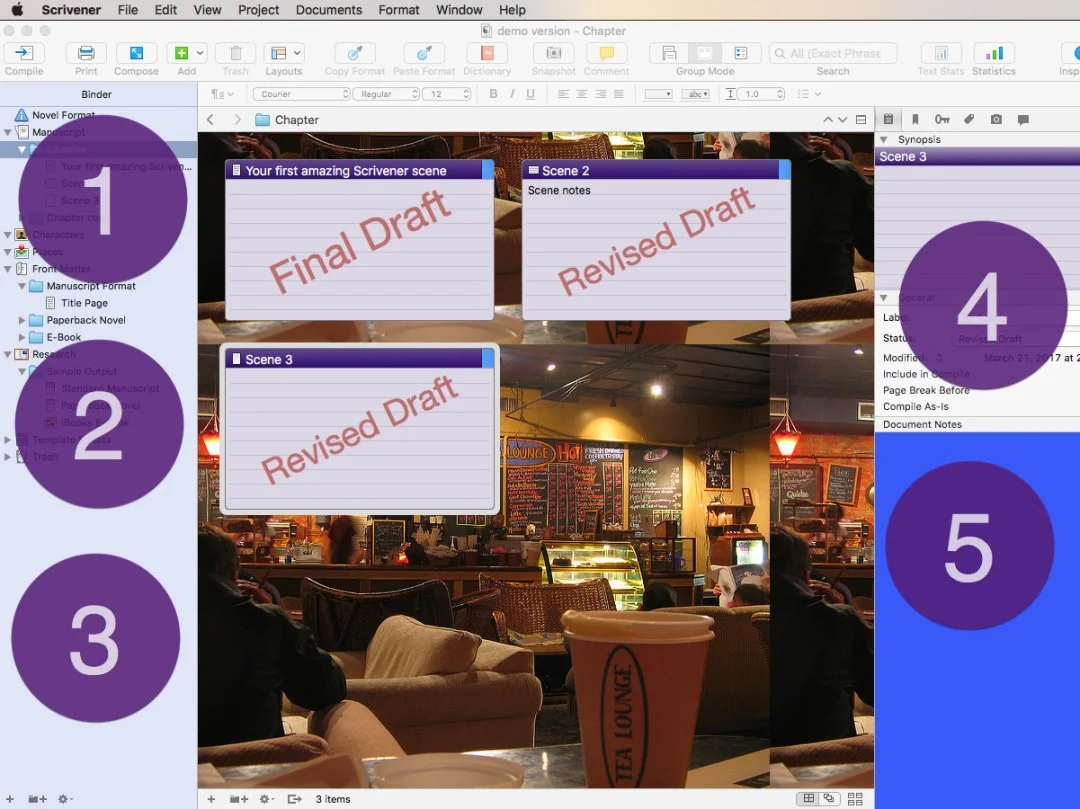
One of my favorite features of the Scrivener app is the corkboard, because it lets you write sections or notes in whichever order you prefer, and easily move them around later. Here's what an example of what the corkboard view looks like:

If you've ever used PowerPoint, think of the corkboard as the slide sorter that lets you move your slides around. Or to use a simpler model, the corkboard is exactly that. It is where your index cards (scenes) reside in electronic form. Each scene you write automatically also becomes an index card (that represents the scene). But you can add notes to the index cards separate to the scene itself.

To switch views (from writing mode to corkboard), you can use this icon on the top of the screen. Writing mode (or scrivenings view) is on the left, corkboard comes up if you click the center, and the right choice switches to outline view (which is exactly what like it sounds).

You can also switch views from the top menu, by choosing View>> and selecting one of the 3 view options.
Step 5 Who's this inspector dude?
Not a person but a function of the software. But weird name right?
The inspector will show up on the right of your screen. There's a lot of functionality here (several different tabs) and at first the inspector is one reason Scrivener seems overwhelming.

I like to think of the inspector as a post it note on top of each index card (or text file). There are a ton of things you can write on that post-it note, but it's basically a way to store extra data about the scene you are working on.
For example, I use the inspector fields to mark the status of scenes (first versus second draft, whether beta feedback remains to incorporate or not), as well as noting the lead character and timeframe of each scene (helpful when you have a dual timeline or multiple points of view).
But, you don't need to learn the inspector to start writing. I just wanted to explain because it confuses folks.
One of the best reasons to use Scrivener is it auto saves your work one word at a time. But, I also recommend to learn one additional feature before you start which is snapshots.
What are Scrivener snapshots?
Snapshots are a little like Word's auto save feature, but better. At any point you can hit the snapshot button and make a full copy of the current version you are working on. Later, you can return to any of the prior versions you created snapshots for at any point (all without leaving the scene you are working on). Unlike Word you don't have to find and open a different file to go back in time - simply select the prior version from the inspector panel at the right of your screen and you can see the current and the prior version at the same time.

Snapshots are too much to explain in a starter article, but this page has a great tutorial on scrivener snapshots.
So, are you ready to write your first text in the Scrivener app?
First you'll want to Create a New file (as I showed you in Step 3). After that, it's time to get those juices flowing.

Anything else you'd like to know about Scrivener or author tech? Leave me a message in the comments or email me.